

1. Go to Firebase and sign in with your Google account:
2. Click on CREATE NEW PROJECT
3. Enter your project name and click CREATE PROJECT
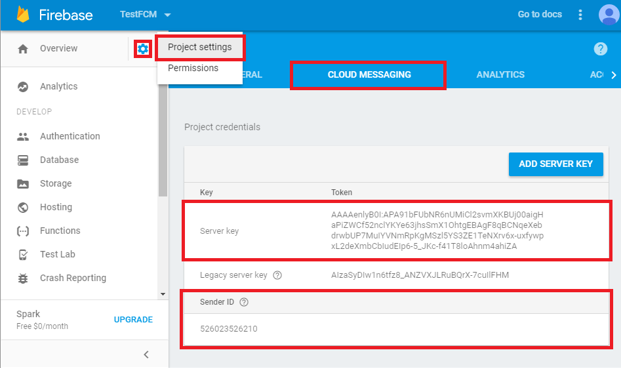
4. Click the Gear icon on the top left and select Project Settings.
5. Select the CLOUD MESSAGING tab.
6. Here you can see your Server Key and Sender ID. Save them.
7. Create your OneSignal account here:
https://www.onesignal.com/
8. Click ADD APP button.
9. After you have typed your app name, select Google Android.
10. Paste Firebase Server Key and Sender ID from step 6 to their corresponding places. Click SAVE.
11. On the next step, select Native Android and click NEXT.
12. You will be presented with your App ID. Save it.
13. Open Swapp in Android Studio, and go to file
build.gradle (Module: app) in folder Gradle Script.
14. Find onesignal_app_id and replace text
PUT YOUR ONESIGNAL APP ID HERE to your APP ID from step 12.

15. Click Sync Now in the top right corner.
16. Run your app on emulator or real device. Once the app is loaded, go back to your OneSignal setup page and click Check Subscribed Users.
If you see a green screen congratulating you, it means your setup is valid and you can continue. Click DONE to finish this setup.
17. On the right side, you will see SEND A PUSH MESSAGE. Here you will customize and send your messages.